How should I use WebdriverIO?
WebdriverIO is Javascript based test automation framework built over Node.js. It is a custom implementation for selenium’s W3C webdriver API.
Here’s why you should be using WebdriverIO for testing:
- It’s Front-end Friendly
- It Has the Power of Selenium
- It’s simplicity and easy syntax
- It’s Easily Extendable
Let’s Get Started!
WebdriverIO is a ‘npm’ package and runs on ‘Node.js‘. So, we need to install Node.js in our machine before installing WebdriverIO. Make sure you install at least v12.16.1 or higher. To check the version or to verify if node.js is installed successfully type the following command:
node -v
If Node is installed correctly then you will be able to see node installed version.
After installing Node.js, create a project folder where we will keep all our files. You can name the folder whatever you want, I am going to call it WebdriverIOTesting. To create the Project folder and navigate to it run the following command:
mkdir WebdriverIOTesting
cd WebdriverIOTesting
Next we will initialize our package.json file by typing the following command:
npm init -y
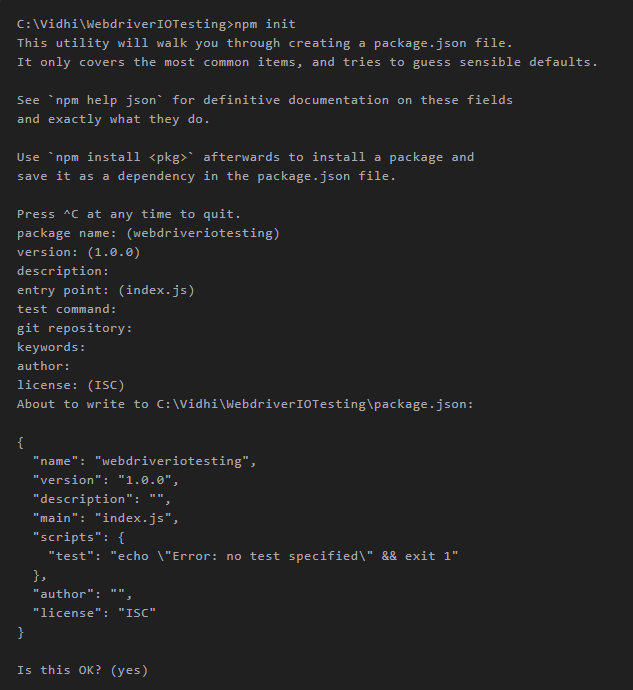
Note: The -y option that we added with the command is optional. The option sets up default package.json setting by skipping all input asking for yes. If you do not add the -y then answer the questions appearing on the terminal and configure the file manually
If you skip ‘-y’ option then make sure you do the following:
Install WebdriverIO
To install WebdriverIO run the following command:
npm install webdriverio
Let the coding begin!
Create the specs folder by running the command:
mkdir -p ./test/specs
Now, create a WithoutWdioClient.js file specs folder. Write the following code in the file:
const webdriverio = require('webdriverio'); //calls the package installed earlier
const options = {
    desiredCapabilities: {
        browserName: 'chrome' //Select a browser of your choice
    }
};
webdriverio
    .remote(options) //Passing configurations
    .init() // Initiating WebdriverIO
    .url('http://www.google.com') //Navigates to google.com
    .getTitle().then(function(title) { // Gets the title of the page.
        console.log('Title is: ' + title); // Prints the title of the page.
    })
    .end();
Note: You may keep the browserName as per your choice. WebdriverIO supports the following famous browsers: Edge, Chrome, Firefox, Safari, PhantomJs.
Let’s test our work!
To install the selenium server utility, run the following command:
npm install -g selenium-standalone
Note: Ensure that you have the minimum required version of Java. Currently for a Selenium version greater than 3.0.0, it is Java 8.
To update selenium standalone server and browser drivers to latest versions run the following command:
selenium-standalone install
To start the selenium server, run the following command:
selenium-standalone start
To execute WebdriverIo test open a new terminal and type the following command:
node ./test/specs/WithoutWdioClient.js
As soon as you run the command, you will see your browser open and navigate to Google webiste. This happens very fast! If you observe the terminal Title is: Google is printed.
Bravo! You have successfully implemented a WebdriverIO code without using the ‘wdio test runner’
If you get stuck somewhere do not hesitate to reach out to me!
